Fitting a Full-Replacement Bull Bar to the L663 Defender: Sensors, Radar, and Cooling
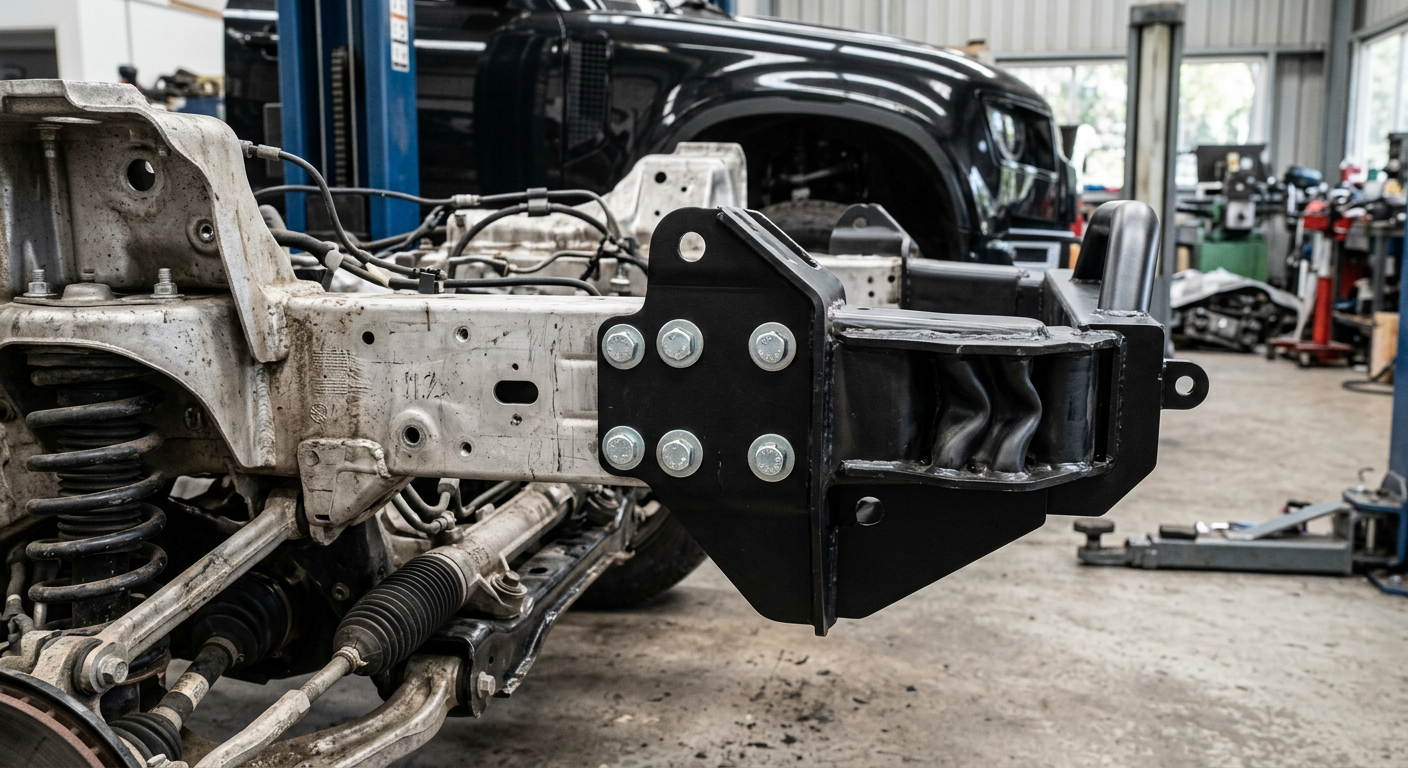
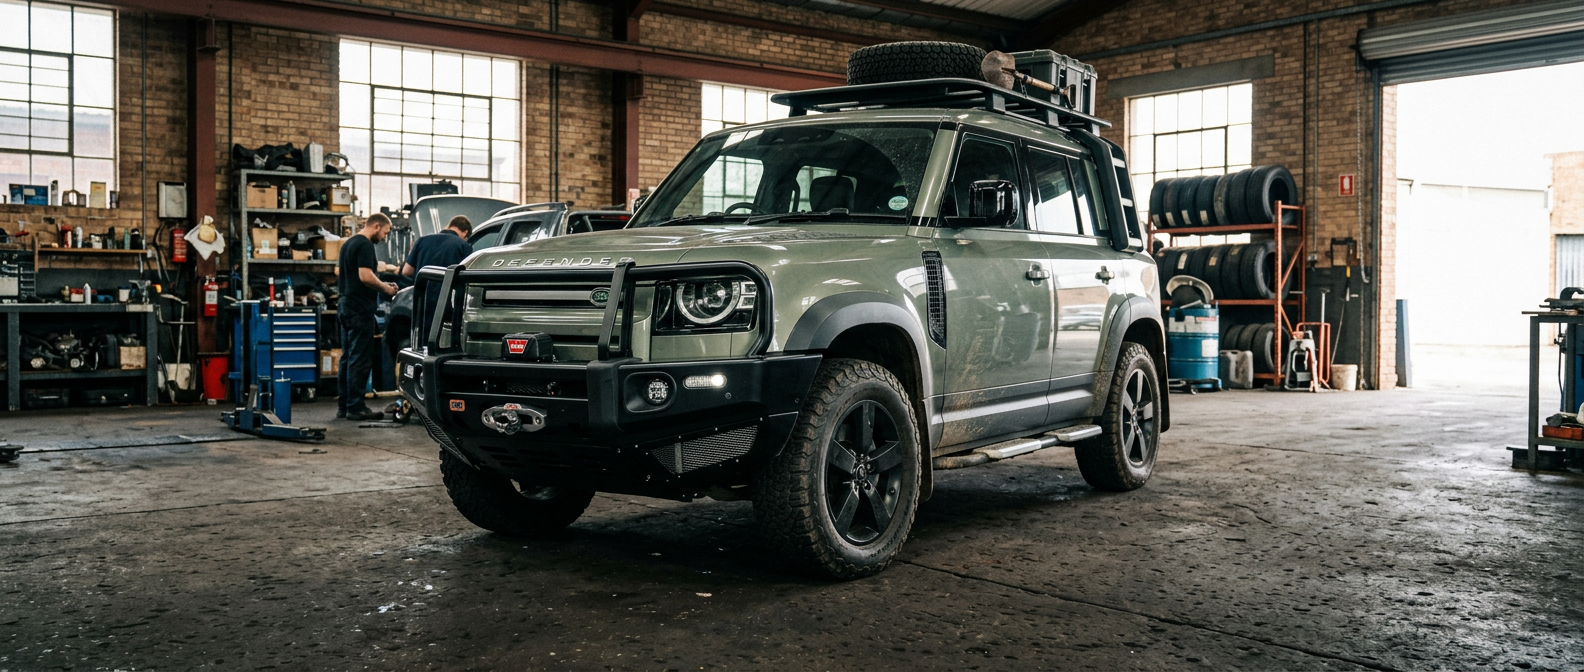
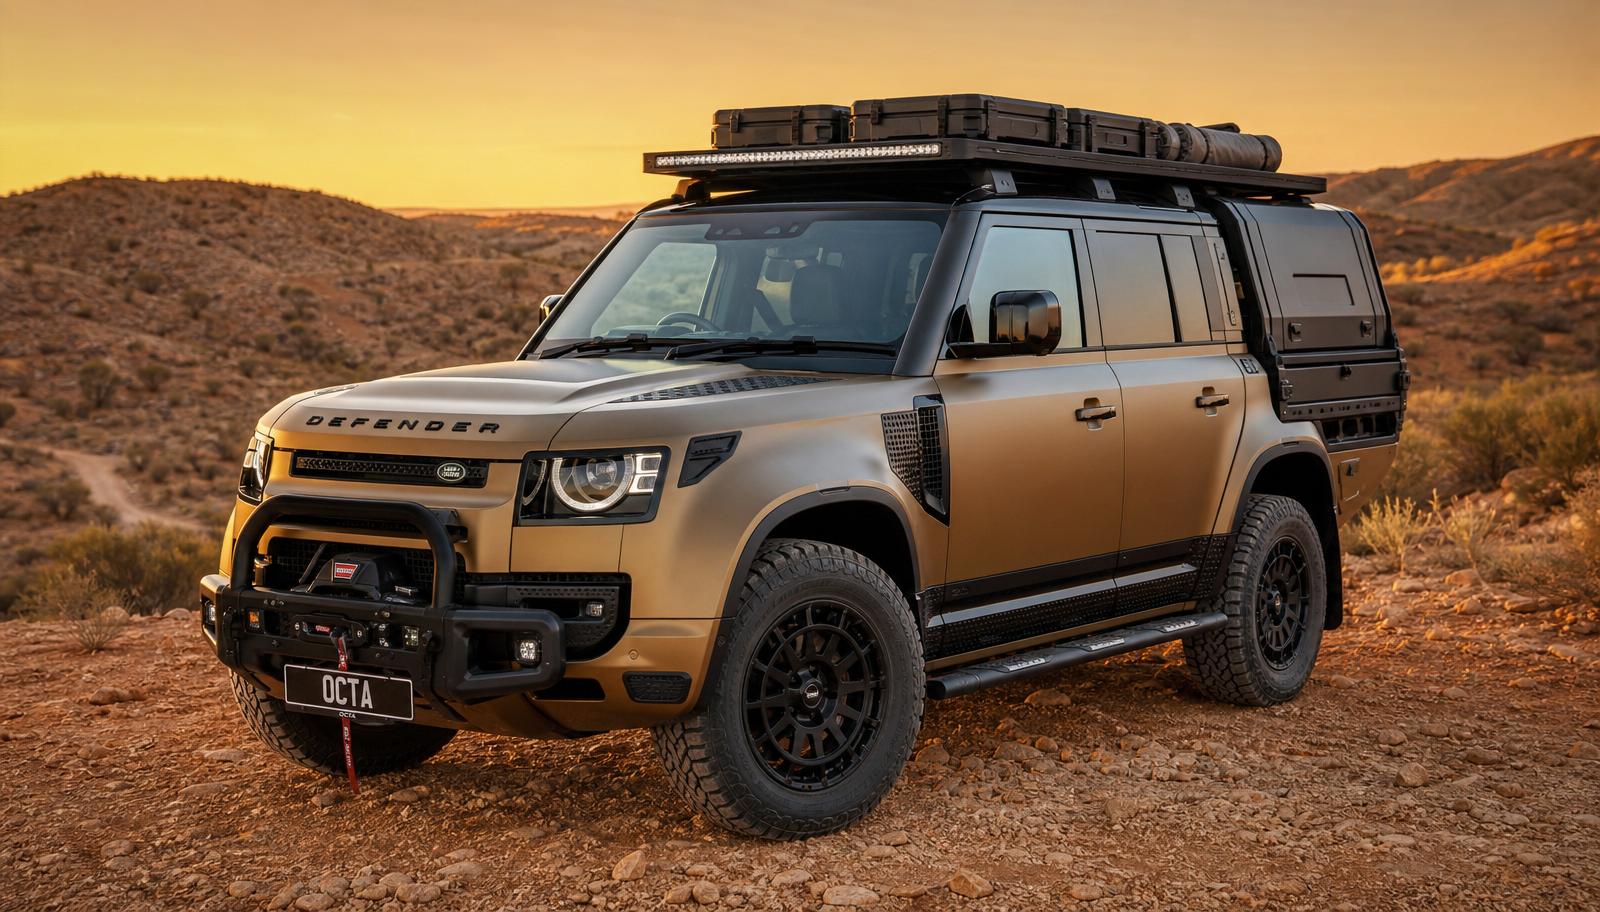
Retrofitting a structural bull bar to the L663 Land Rover Defender requires navigating complex safety, driver-assist, and thermal systems. This technical guide covers structural mounting to the D7x monocoque, calibrating ADAS radar and 3D cameras, and maintaining airflow to critical auxiliary radiators.
Structural Integration and Monocoque Chassis Mounting
Unlike its body-on-frame predecessor, the L663 Land Rover Defender is built on the aluminium-intensive D7x monocoque platform. Installing a full-replacement metal bull bar requires anchoring the accessory directly to the vehicle's front subframe mounting points rather than a traditional ladder chassis. The installation process begins with removing the factory plastic bumper assembly, internal aluminium crash beam, and the lower active grille shutter assembly. The replacement bar's mounting brackets must be fastened to the front of the chassis rails using high-tensile steel fasteners (typically Class 10.9 or 12.9) that torque into existing structural threads. This direct interface is critical, as any misalignment during mock-up will transfer directly to the exterior body panels, causing uneven gaps between the bar, bonnet, and front wings.
A primary safety concern when fitting a structural bar to a monocoque vehicle is the retention of Supplementary Restraint System (SRS) airbag compatibility. Factory crash sensors are calibrated to register specific deceleration curves before triggering airbag deployment. A poorly engineered bull bar that is too rigid can transmit impact energy directly to the cabin too quickly, causing premature deployment, or conversely, absorb too much low-speed energy and delay deployment. Compliant aftermarket bull bars incorporate engineered crumple brackets or 'crush cans' designed to mimic the deformation rate of the factory aluminium crash beam. During installation, these crush brackets must be aligned perfectly parallel to the chassis rails to ensure that offset impacts still trigger the SRS sensors correctly.
Galvanic corrosion is another critical factor. Because the L663's structure is predominantly aluminium and aftermarket bull bars are typically fabricated from structural mild steel or powder-coated structural steel, direct metal-to-metal contact must be avoided. Installers must use the supplied non-conductive isolator washers, zinc-plated or dacromet-coated fasteners, and anti-seize compounds on all mounting faces. Failure to isolate these dissimilar metals will result in rapid galvanic corrosion of the aluminium chassis components, compromising structural integrity over time.
Preserving ADAS: Relocating the Front Radar and Sonar Sensors
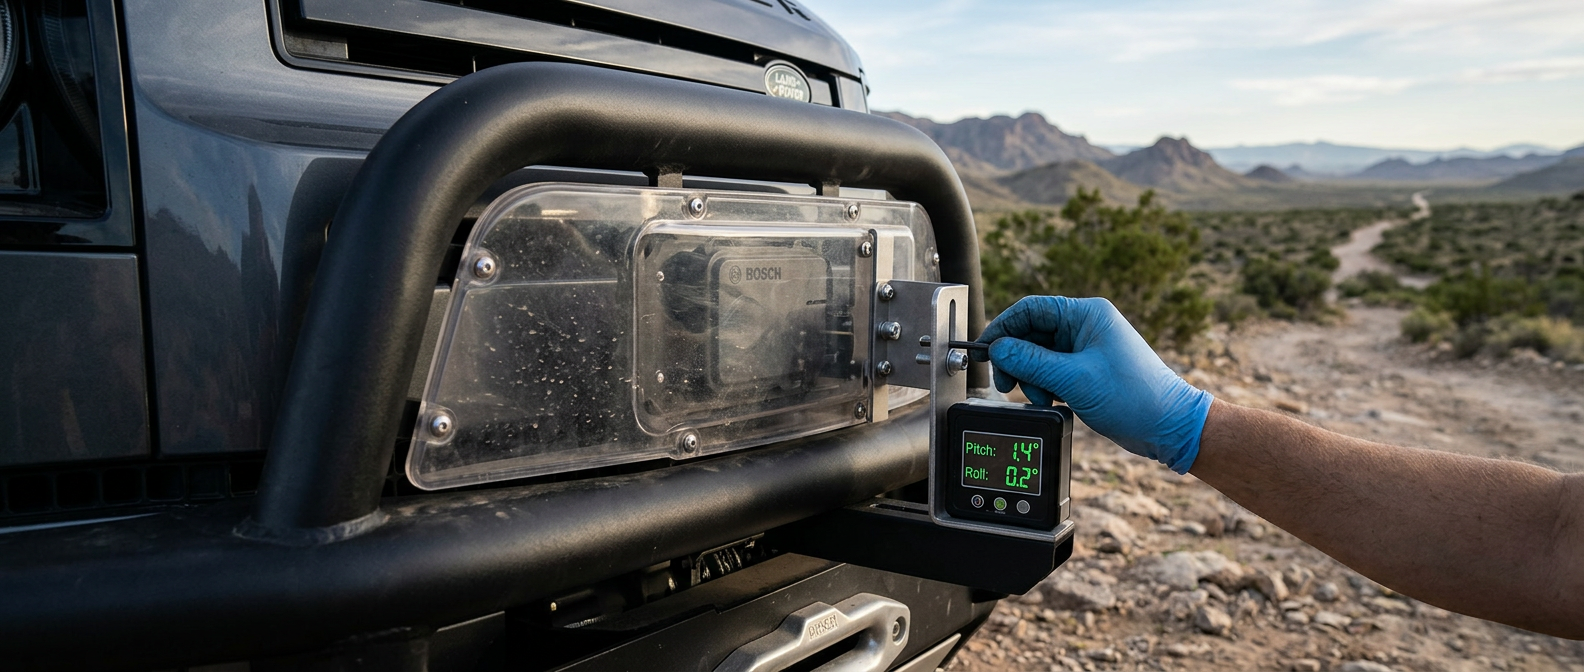
The L663 Defender relies heavily on its Advanced Driver Assistance Systems (ADAS), which are managed by the vehicle's EVA 2.0 electrical architecture. The Adaptive Cruise Control (ACC) and Autonomous Emergency Braking (AEB) systems utilize a Bosch mid-range radar sensor mounted centrally behind the factory bumper. When fitting a full-replacement bar, this radar module must be relocated to a dedicated bracket within the new bar structure. The bracket must position the radar at the exact height and offset relative to the vehicle's centerline as specified by the bar manufacturer, usually shielded behind a radio-transparent polycarbonate cover to protect the sensor face from stone damage without blocking the high-frequency radar waves.
Once relocated, the radar module's alignment is highly sensitive. The module must be levelled precisely using a digital inclinometer to verify pitch and roll, which must typically remain within +/- 0.5 degrees of the factory specification. A misaligned radar will fail to track vehicles ahead accurately, leading to sudden 'phantom braking' events, failure of adaptive cruise tracking, or dashboard diagnostic trouble codes (DTCs) that disable the AEB system entirely. If the system detects a permanent misalignment, a physical calibration procedure must be carried out using diagnostic software such as Pathfinder or TOPIx Cloud, combined with a dynamic calibration drive where the vehicle learns its new alignment parameters on marked road lanes.
Ultrasonic parking sensors (sonar) present a different physical challenge. These sensors are calibrated to operate within plastic bumper skin thickness (typically 2.5mm to 3.5mm). Structural bull bars are usually constructed from 3mm to 5mm steel or aluminium. Placing an ultrasonic sensor directly into a thicker metal hole causes 'ringing'—where the sensor's high-frequency vibrations bounce back through the metal bar itself, registering as a constant obstacle (false positive). Installers must use vehicle-specific silicone isolator boots and custom mounting sleeves that physically decouple the sensor body from the metal bar. Additionally, the sensors must be reinstalled in their exact factory sequence and orientation (outer, inner-left, inner-right, outer) to preserve the correct detection arcs.
3D Surround Camera Relocation and Alignment Calibration
The Land Rover 3D Surround Camera system uses four ultra-wide-angle cameras, with the front camera positioned in the lower section of the factory front grille. Depending on the design of the replacement bull bar—particularly those featuring top loops or integrated winch cradles—the front camera's line of sight may be partially obscured, or the camera itself may need to be relocated forward. If the camera is moved, even by a few centimetres, the image stitching algorithm within the Image Processing Module (IPMA) will display a distorted overhead 'bird's-eye' view, with misaligned stitch lines on the Pivi Pro infotainment screen.
To correct this, many bull bar kits include a camera relocation bracket that repositions the camera lens slightly forward of the bar's upper edge. This bracket must hold the camera perfectly rigid; any vibration introduced by wind resistance or rough terrain will degrade the image quality and cause the digital image stabilization software to fault out. After physical installation, a static camera calibration is highly recommended. This involves placing specialized calibration mats around the vehicle and executing the camera calibration routine via an OBD-II diagnostic tool. The IPMA will capture the new camera height and angle, recalculating the pixel coordinates to deliver a seamless, undistorted 3D ground projection.
Furthermore, if the bull bar is fitted with a winch, the fairlead and hook can obstruct the lower third of the front camera's field of view. To prevent this, choose a low-profile fairlead and secure the winch hook flat against the bar using a factor-style shackle mount. This keeps the camera's visual path clear, allowing the off-road 'ClearSight Ground View' system to function correctly without digital artifacts or blind spots directly in front of the tyres.
Thermal Management and Auxiliary Cooling Ducts
The powertrain options in the L663 Defender—particularly the P400 mild-hybrid inline-six and the D250/D300 Ingenium diesels—have complex thermal management systems. In addition to the central radiator, these vehicles utilize auxiliary heat exchangers (radiators) tucked into the lower front corners of the bumper, behind the fog light assemblies. These auxiliary radiators cool the low-temperature circuit for the water-to-air charge coolers and assist with engine oil and transmission cooling. The factory plastic bumper utilizes highly engineered plastic ducting (shrouding) that seals against the inner face of the bumper to force high-velocity air directly through these heat exchangers.
When removing the factory bumper to install a steel bull bar, this plastic ducting is typically discarded. If the aftermarket bar does not feature engineered replacement ducting, air will follow the path of least resistance and bypass the auxiliary radiators entirely, flowing around them into the wheel arches. Under heavy load, such as towing uphill or crawling through deep sand in high ambient temperatures, this lack of directed airflow can cause rapid spikes in transmission fluid and intake air temperatures, forcing the engine control module (ECM) to reduce power output (limp mode) to protect the drivetrain.
High-quality, vehicle-specific bull bars address this by including laser-cut steel or aluminium air-deflection plates. These plates must be carefully aligned and bolted between the bull bar chassis brackets and the inner wheel arch liners. During installation, ensure these plates fit flush against the auxiliary heat exchangers, using foam sealing tape where necessary to recreate the high-pressure zone required to draw air through the cooling fins. Additionally, check that the lower skid plate section of the bull bar does not block the exit paths for this cooling air, which typically vents out through the louvres in the front wheel arch liners.
Wiring Harness Routing, Corrosion Prevention, and Washer Jets
The factory front bumper wiring loom is integrated into a single main harness that plugs into the vehicle's primary body harness via a multi-pin connector located on the passenger-side inner wing. When installing a bull bar, this harness must be carefully stripped of its factory outer tape, split into individual branches to reach the relocated sensors, and re-wrapped in high-quality automotive-grade split-conduit or Tesa fabric tape. Because the harness is now exposed behind a metal bar rather than protected by a plastic bumper, routing is critical. Secure the loom along the upper structural members of the bull bar using UV-resistant cable ties, ensuring there are no contact points with sharp metal edges or hot cooling components.
Where the harness passes through laser-cut holes in the steel bull bar plates, install rubber grommets to prevent the metal from chafing through the wire insulation over time. Any exposed, unused factory connectors—such as those for the factory fog lights if the new bar does not utilize them—must be sealed using blanking plugs or heat-shrink tubing filled with dielectric grease. Leaving these connectors open will invite water ingress, leading to corrosion at the terminal pins, which can introduce resistance faults on the local interconnect network (LIN-bus) or controller area network (CAN-bus) lines, causing intermittent electrical gremlins across multiple vehicle modules.
Finally, if the Defender is equipped with headlight washers, the high-pressure fluid lines must be integrated into the new bar. The factory hoses must be carefully routed to the new nozzle positions on the bull bar wings, ensuring there are no tight bends that could kink the hoses and restrict fluid flow. The factory check-valves must be retained in the circuit to prevent the windshield washer fluid from slowly siphoning out of the reservoir when the vehicle is parked on an incline. Secure all push-lock fittings with locking clips to withstand the high pressure generated by the headlight washer pump.